
A Little History of Pan de Muerto
Pan de Muerto (Bread of the Dead or Day of the Death Bread) is an essential element on every altar during Día de Muertos, the traditional Mexican celebration that honors the lives of our loved ones who have passed away.
What we know today as the Day of the Dead is the result of a fusion between Spanish Catholic festivities and pre-Columbian Mesoamerican indigenous traditions. It’s important to remember that every Mesoamerican culture had its own rituals surrounding death—each with distinct customs and beliefs.
In its origins, the celebration was quite different. For example, within Mexica culture, it wasn’t simply about honoring or remembering the dead, but about helping their souls on their journey to eternal rest—a journey believed to be long and perilous. To assist them, the deceased were buried with offerings and provisions for the road ahead, including food, in case they grew hungry along the way.
While Pan de Muerto as we know it wasn’t part of those ancient rituals, the idea of “bread for the dead” was linked to Aztec human sacrifices. Back then, the bread looked completely different: it was made with sesame seeds and even blood from a ritual sacrifice, which might explain the name Pan de Muerto. That, of course, is just my own speculation—please don’t take it as historical fact.
But personally, I find today’s version—the one made with flour, butter, and orange blossom—much more appetizing, don’t you? So, let’s move on to the good part: the bread itself.
What do my Mexican family and friends say about this Pan de muerto?
The recipe I’m sharing with you is a product of my culinary school training, and over the years, I have refined and perfected it. While I may be biased in my opinion, I truly believe it’s an outstanding recipe. I guarantee you’ll enjoy it as much as my friends and family do; here’s what they have to say about my PAN DE MUERTO.
No, no, no. WOW. As soon as we opened the box the scent came out and we knew it was going to be good! I imagined it was going to be delicious, but this bread turned out to be the best pan de muerto I’ve ever had in my life. It’s just so soft, and the flavor of orange is very noticeable—something you don’t find too often in pan de muerto. Who knew pan de muerto could taste this gourmet?
Norma Angélica Medina Martinez, 2024
The most remarkable aspect of this quote is that it came from Norma, who was born and raised in Mexico and has spent her entire life there; this gives her profound insight into what an authentic pan de muerto should truly taste like. Having experienced countless variations of Pan de Muerto throughout her life, her perspective is invaluable.
Therefore, if I were in your position, I would certainly not underestimate that compliment!
Understanding Bread: The Science of Lean vs. Enriched Doughs
Croissants, French bread, cinnamon rolls, whole wheat loaves, pan de muerto, focaccia… They all belong to the same family—bread—yet their flavors and textures are so completely different. Why is that?
To understand this, we have to classify bread doughs. As mentioned by baker and author Peter Reinhart in his book The Bread Baker’s Apprentice: Mastering the Art of Extraordinary Bread, all doughs can be categorized by hydration, richness, pre-fermentation, leavening agent, and structure.
Today, we’ll focus on the richness category.
Lean vs. Enriched Doughs
Within this category, there are two main types of dough: lean and enriched.
Lean Doughs
As the name suggests, lean doughs contain no fat. They are made only from:
- Flour
- Salt
- Leavening agent
- Water
Examples of lean doughs include bolillo, baguette, or artisan breads. These breads are firm, airy, and have a crisp crust. Picture a sandwich made with a baguette—the first thing you imagine is that unmistakable crunch when you bite through the crust.
Enriched Doughs
On the other hand, enriched doughs include fats such as butter, oil, or eggs in addition to the basic ingredients. When a dough contains more than 20% of its weight in fat, it’s considered enriched.
But how does fat change bread so dramatically?
In simple terms, fat interferes with gluten development, the protein network that gives bread its structure. Without gluten, we’d have something closer to an omelet than bread. So, what do bakers do when we want to add fat but still need that structure?
The answer is simple: we develop the gluten first, before adding the fat. Even so, enriched doughs require longer kneading times because of their high fat content. The process can be tedious, but there’s a reward—fat slows down fermentation, allowing deeper flavor development and yielding breads that are more tender, rich, and aromatic.
Think of a cinnamon roll or a pan de muerto—soft, buttery, heavy with sweetness and memory. Now that we understand the science behind fat, we can appreciate why pan de muerto is (or at least should be—though some bakeries do cut corners) so soft, fragrant, and absolutely irresistible.
This is not a bread that should ever be rushed. It’s meant to be made slowly, with care, with memory, and with love.
Conclusion
Next time you enjoy a heavenly slice of enriched bread or a crispy piece of lean bread, take a moment to appreciate the intricate science behind it. Happy baking!
authentic Pan de Muerto Recipe:
Ingredients
Sponge
- 114 g (½ cup) warm milk
- 15 g (1 tbsp) granulated sugar
- 12 g (1 tbsp) active dry yeast
Dough
- 150 g (about 3 large) eggs
- 80 g (about 4) egg yolks
- 145 g (¾ cup) granulated sugar
- 4 g (¾ tsp) fine salt
- 500 g (4 cups) all-purpose flour
- 12 g (2 tsp) orange blossom water
- 12 g (zest of about 2 oranges) orange zest
- 150 g (⅔ cup) unsalted butter, at room temperature
- Canola or vegetable oil, for greasing
Bones Decoration
- 20 g (2 tbsp) all-purpose flour
- 20 g (1 tbsp + 1 tsp) water
For Brushing
- 50 g (3 tbsp) cream
To Finish
- 30 g (2 tbsp) melted unsalted butter
- 50 g (¼ cup) granulated sugar
Instructions
1. Make the Sponge
Warm the milk until it reaches 40–43°C (105–110°F). In a small bowl, mix the milk, sugar, and yeast. Cover with plastic wrap or foil and let it rest in a warm place until foamy, about 15–20 minutes.
2. Prepare the Dough
In the bowl of a stand mixer, combine the yeast sponge, eggs, yolks, sugar, and salt. Mix on low speed until smooth.
Add the flour and continue mixing on low (speed 3) for about 3 minutes, just until a dough forms. The dough won’t be elastic yet — that’s normal.
3. Add Flavorings
Incorporate the orange blossom water, orange zest, and butter. Follow me on social media!
Knead with the dough hook on medium speed (4–6 on a KitchenAid) until the dough becomes elastic and smooth, and can be stretched thin like a transparent sheet without tearing. This process may take around 45 minutes.
4. First Rise
Lightly flour your work surface and shape the dough into a ball.
Grease a large bowl with oil, place the dough inside, and lightly oil the top as well. Cover with plastic wrap or foil and let it rise in a warm place (27–30°C / 80–86°F) until doubled in size, about 1½ hours.
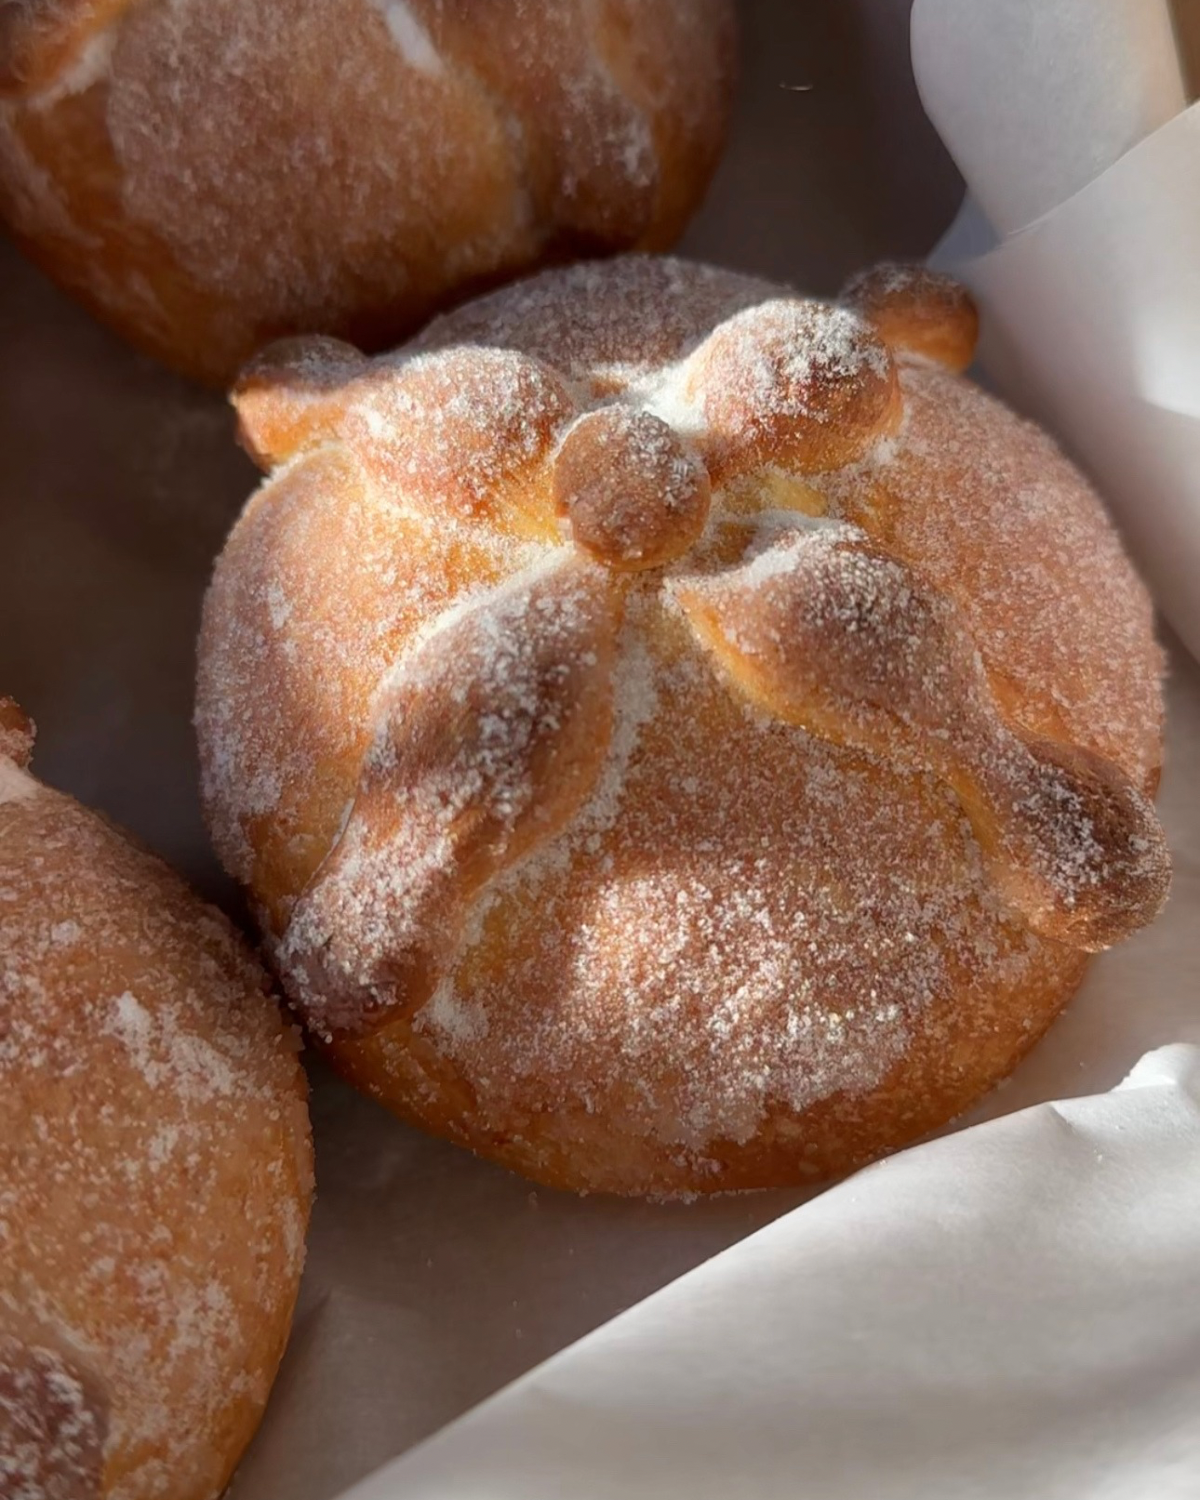
5. Shape the Bread
Once doubled, punch down the dough and transfer it to a floured surface.
Divide it into equal portions for each bread, reserving a small piece to form the “bones.” Shape each piece into a tight ball and place them on a parchment-lined baking sheet.
6. Prepare the Bones
Mix the reserved dough with 20 g flour, kneading until slightly firmer than the main dough; this takes as little as 2 minutes — this helps the bones hold their shape.
Roll the dough into small logs, then use your fingers to gently roll sections back and forth to create the “bone” texture. Attach the bones over each dough ball using a bit of water and a pastry brush.
7. Second Rise
Cover the shaped breads with a clean kitchen towel and let them rise in a warm place until doubled in size, about 45 minutes to 1 hour.
8. Bake
Preheat the oven to 180°C (350°F).
Brush the tops of the breads with cream and bake for 18–20 minutes, or until golden brown.
9. Finish
Let the bread cool down a little bit. While still warm, brush with melted butter and sprinkle generously with sugar, take a picture and tag me!

Leave a comment